05. Response Template
- Tender->Response Template
-
Assign a template to a Tender
Response templates represent the forms and data that a bidder will have to capture when submitting a bid.
As many templates as needed can be added.
Create and updating of forms are done in two processes.
- Updating the template.
- Assigning the template to the tender document. Once a template is assigned to tender a copy of the template is created. This allow this unique form to be editing without affecting template forms.
Two types of forms exist in the system.
To create customer forms a potential bidder must complete when submitting a tender response.
- Create the form in the system forms module (admin module)
- Assign the form to use on the tender
Open the relevant tender and select response template on the context menu
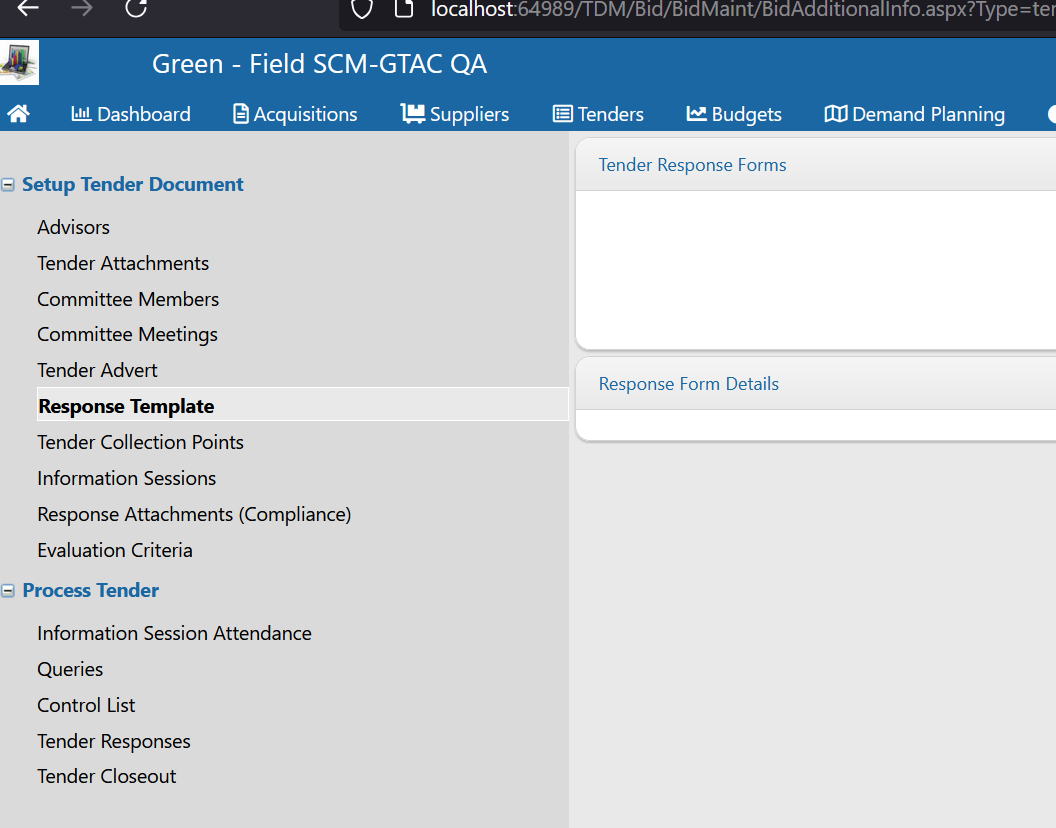
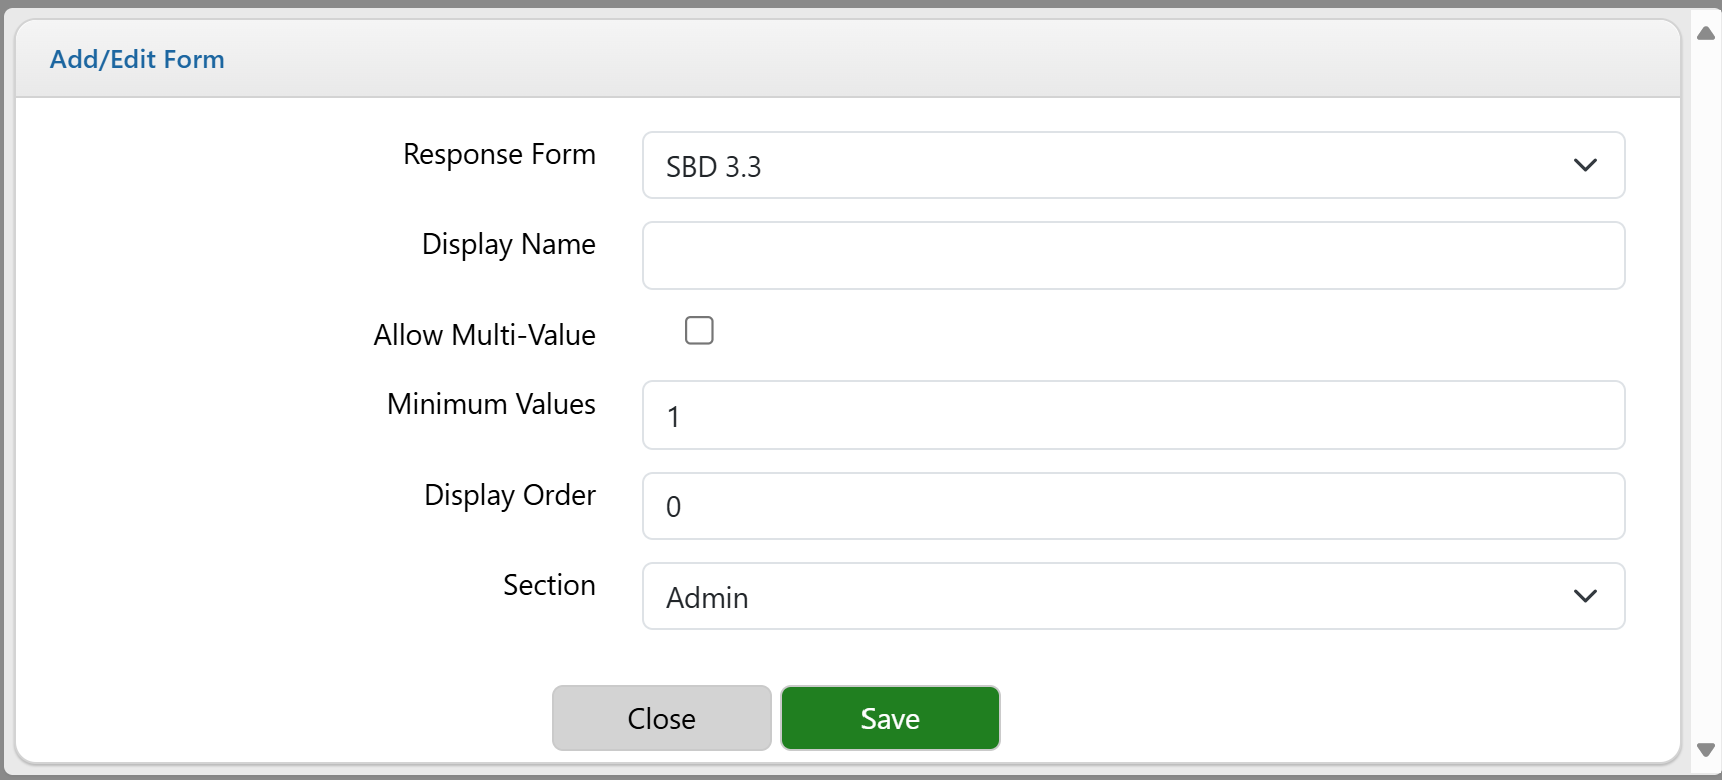
Each bidder will be required to complete this form when submitting responses, this applies to both Green-Field and the Vendor Portal
Response Form: The system template that the user will have to complete. The supplier does not see the name of the template.
Display Name: The name of the form that the supplier will see. For example, SBD Forms, Pricing Schedules etc.
Allow Multi-Value: If the supplier is required to complete more than one of the forms when submitting a response. Used in cases where suppliers must submit multiple CV's etc.
Minimum Values: In the case where the supplier can submit more than one form. This value indicates the minimum number of forms to submit. The system will not allow the supplier to submit their bid without completing the minimum number of forms. Leaving the value as 0 will not enforce any minimum.
Display Order: The order in which the supplier will be required to capture the forms
Section: The section on the vendor portal where the form will be added.
Editing Templates
There are two types of forms in the system
1. Template. A template can be editing and maintained as a master document. Once a template is assigned to a tender, a copy of the template is created and assigned to the tender. This allows the user to edit the form assigned to the tender without affecting the original template.
2. Form assigned to a tender. This a form assigned to a tender.
To edit a template or form navigate to
Tender -> Tender Maintenance -> Response Templates
Click the popup button and select edit forms
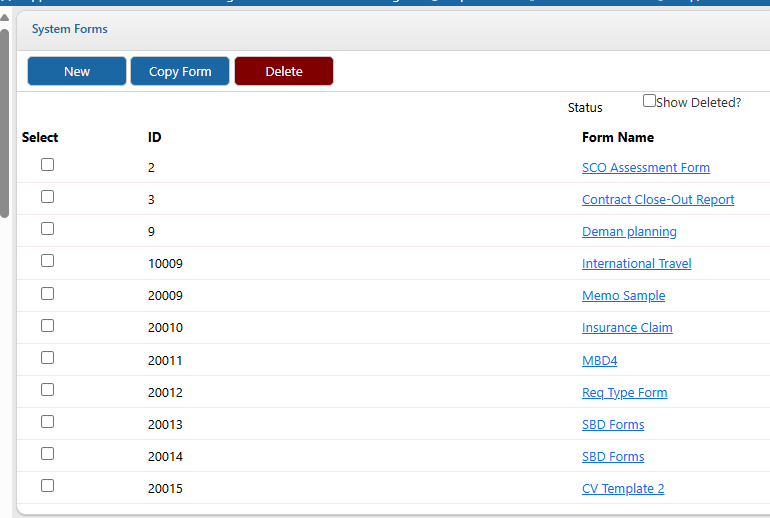
Each form has a unique name and can be marked as a template.
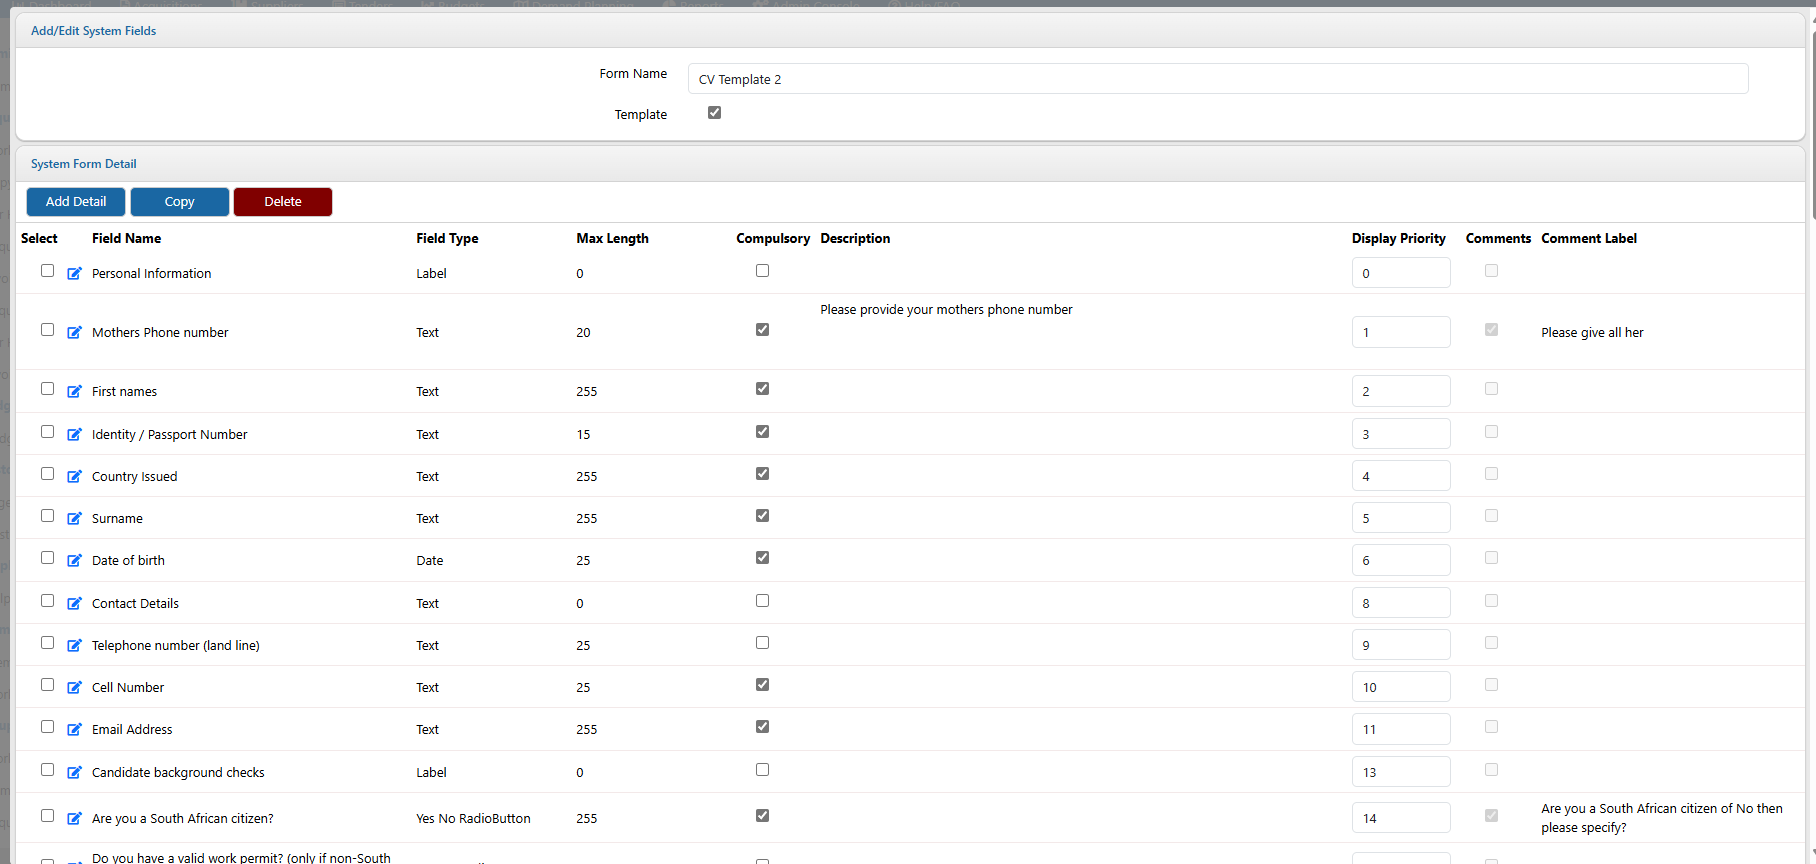
The form detail section shows all fields added to the form.
The sequency of the fields can be altered by updated the display priority field.
Fields or groups of fields can be copied and new fields created. This is done by selecting the fields and clicking the copy button. New fields will be added to the end of the existing form
Editing an existing field or create a new one
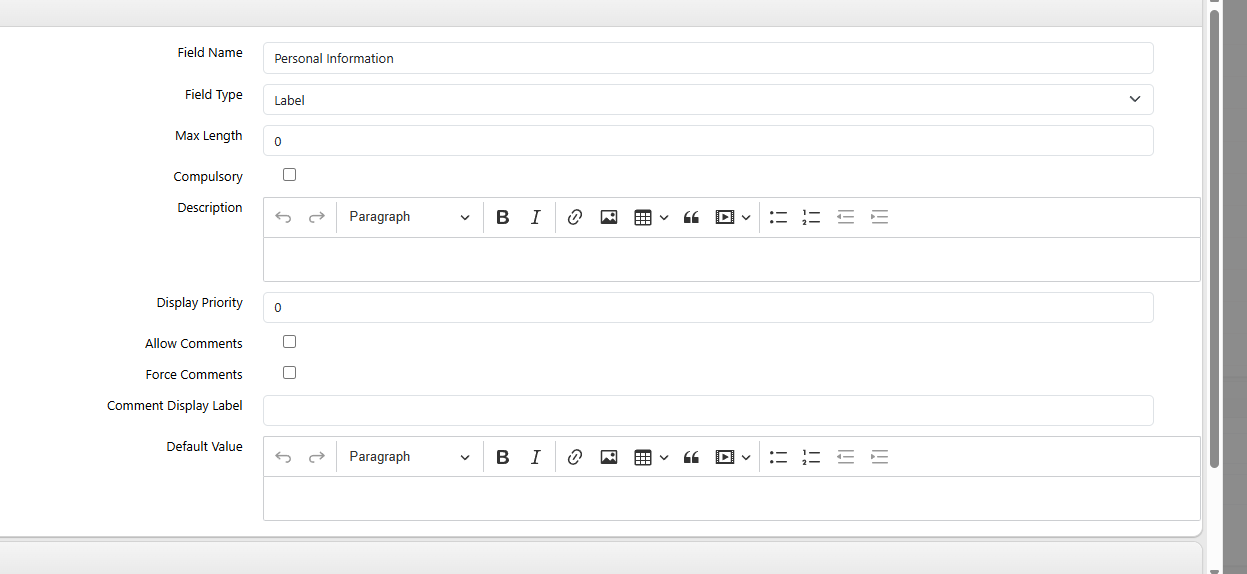
Field Name: The name of the field as displayed on the vendor portal
Field Type: The type of field. Each type will automatically create on the vendor portal. The following types are the most commonly used
1. Label. Displays static text, user for headings or section separation. The user will capture any data
2. Number. A textbox will be created and forcing the user to enter a numeric value
3. Date. A textbox with a calendar popup will be created.
4. Drop down. A dropdown box will be created, if this option is select the different options to appear in the dropdown must be added to the form lookup section.
5. Text. A textbox will be created
6. Attachment. The user will be required to upload a file
7. Checkbox. A checkbox will be created.
8. Yes No Radio button. A yes or no option will be created
9. Multi Line Text. This will create a rich multi line textbox to allow the user to enter multiline and formatted text.
10. HR is a static separator field. Used to separate parts of the form
Max Length: The total number of characters allowed to be captured. Enter 0 for unlimited.
Compulsory: Indicates the user will be forced to enter the field
Description: More detailed description about the field. This is rendered underneath the field name on the Vendor Portal
Display Priority: The sequency in which fields are displayed.
Allow Comments: This renders a comment box next to the field, the user will can add additional comments or clarification for their answer.
Force Comments: The comments will be compulsory
Comment Display Label: The heading added to the comment field
Default Value: The default value that the field will have before the user captures data. Can be used for creating an input table for multi values
Layout

A = Label
B = Field Name
C = Field type
D = Comment Display Label
E = Comment Field
- Date Created
- 2024/08/13 11:29:20
- ID
- 1172